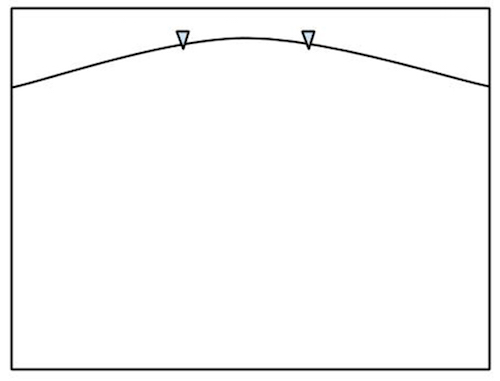
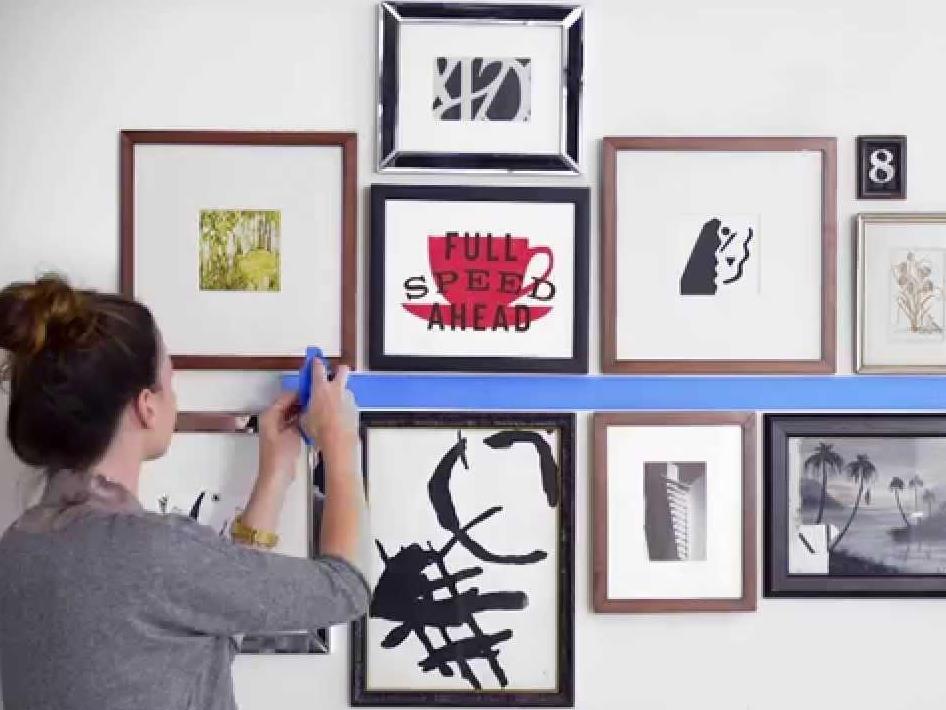
When grouping works it is always a good idea to create a consistent level. Image source freegratitude blog
Whether you are an artist or a collector, many of us feel overwhelmed by the prospect of hanging art.
Choosing the right height, the right tools, and the right place to drill can be a dance with self-doubt, and the joy of your new art work can quickly spiral into stress. But it doesn’t have to.
We give you a few simple tips that will instill in you the confidence of a pro, and ensure those precious additions to your life stay on the wall.
1. Placement
Rule One: Don’t just do – plan. Think about the room: the furniture placement, the sight lines walking into the room, the amount of natural light, the proximity to other artworks and, dare I add, the colour tones.
Recruit a helper. Distance always adds perspective on a decision, so ask a friend to help by holding the piece in place and stepping back to consider the view. When it feels perfect, add a small pencil mark at the top corner to indicate the horizontal and vertical. This may be shuffled slightly when you do your accurate measurements, but it is a great crosscheck.
There are two main factors to be taken into consideration during your preparations. Are there other artworks in the room, and what is their centre point, or will the artwork hang above some object, such as a lounge, table or bed?
The goal is to create a common centre point for all the artworks in a room. This is generally calculated at eye level.
Next rule – the eyes crave symmetry. A grouping of artworks will always look better if they sit in conversation with each other, or other elements in the room. If you are doing a group or a salon hang (multiple pieces hung together) then it is recommended to find either a single common horizontal or vertical line through the grouping to hold it together (top picture).
If you are hanging a small work on a big wall then it looks rather silly centered. You are better hanging it off-centre, centred within one third of the wall. Better still a pair of small works framed gives volume in a large space.
The general rule is to create harmony across a room – don’t just get fixated on the individual artwork and its perfect hanging.

Better to get the tools right, rather than the outfit.
2. The right tools
Any job is made easy with the right tools. The basics include a small standard level, a tape measure, a calculator, pencil, eraser, appropriate hooks, and a hammer. If you are hanging into masonry then you will need plugs for screws and a drill.
Picture hanging wire is made from many finer wires that are twisted together into cable for strength. It is the same technology used on bridges. It is very difficult to cut with standard wire cutters and they tends to leave a frayed end. Invest in a pair of cable cutters designed for small gauge wire and picture hanging – they are fantastic.
Among my favourite tools for hanging art is a laser level, which will shoot a line of light across your wall so that you have an even “hanging line”. It makes it so easy to place a pair of hooks and know that they will be level. This is especially helpful when hanging a row of works or on a grid.
While the laser level has been around since the early 1970s and comes from the surveying industry, today you can buy a domestic scaled level from your local hardware store at a reasonable price.

Choosing the right hook depends on the weight of the artwork
3. Understanding weight
One of the greatest errors that people make when hanging an artwork is to use hanging hardware or hooks that are too light-weight, or adhesive hooks with a “removable” fixative. In both cases, your hanging is doomed.
Rule: The weight of the framed artwork will determine how you hang it.
For most accounts you can use custom picture-hanging hooks: a metal hook with an angled nail that is simply hammered directly into your plaster wall. The angle of the nail is designed to counter the pull of gravity – simple physics. They come in one, two and three nail versions depending on the weight of the artwork. If you are not sure which to buy, pull out the bathroom scales before you head to the hardware store. My advice? Always up-scale to the next weight.
For heavier artworks or when hanging on a brick wall, you need to turn to use a screw with a plug. The type of plug will differ from plaster to brick, so be sure you buy the right one. If you do not plug the screw, gravity will pull the artwork forward and, with time, the screw will drag – messing up levels or even pulling out.
4. To wire or not to wire
The default option for hanging artworks is to use wire. This is not always the best solution – or the easiest.
Rule: We would recommend using D-rings on anything over a metre long, and wire on smaller hangs.
When possible, use two D-rings fixed directly onto the frame or the stretcher and equidistant from the top edge down about one third of the total height.
Once you have measured the exact placement of the artwork, you simply calculate the drop from the top edge of the frame to correspond with a hook nailed directly to the wall (see measuring below for more detail). The D-ring sits directly on the hooks giving a very stable option.
The joy of this option is that it also keeps the work very flat to the wall; none of the falling forward at an angle often experienced when using wires. The downside, is there is very little wobble to “fudge it” if it is not level.
A wire, however, is necessary in some hanging situations e.g. when using a picture rail, or when an artwork is less than a meter in length.
The downside is that wires tend to stretch with time and an artwork may also become skew-whiff with general movement, vibrations and cleaning. To get around this, use two hooks rather than one.

5. Two is better than one
If a piece is heavy or over 70cm wide, we would suggest using two wall nails for added stability. It will help to distribute the weight and actually makes it much easier to level the work.
To measure for two fittings, all the measurements and formulas remain the same. However, instead of placing one hook or screw into the wall, you will use two separated by 15 – 20cm depending on the width of the artwork.
Once you have calculated the height, use a level and a ruler to draw a pencil line between the two picture hooks. The same process is applied when using two D-rings.

Image source utedecorating blog
6. The big measure
Hanging an artwork is the antithesis of the calculated risk. It’s simply calculated.
The general rule of thumb is that you hang with the centre of the artwork at eye height (60 inches or 150 cm from the floor). Remember that is the centre of the artwork – so your first calculation is to measure the height of the picture to be hung, and then divide it in two – let’s call this X.
Next you need to add that number to our ideal height: X + 150 = Y This will give you the correct hanging height for the artwork.
Now you need to calculate for your hanging hardware i.e. the drop of the wire or the placement of your D-rings. Measure from the top of the frame or artwork to the centre of the D-ring or the highest point of the wire as it would sit when tensioned under weight. Take into account if you are using one or two hooks on your wire.
This amount – let’s call it Q – is then subtracted. X + 150 = Y – Q = Z cm. This is where you will place your hook, measuring up from the floor to this point.
While it looks and sounds complicated, it is a pretty easy when you get the hang.
The only consideration is furniture. A bedhead may throw your calculations off, and there’s a need to place the piece higher, as might a sideboard or taller than average piece of furniture.
In this case do your standard measurement from floor to eyelevel and do a small pencil mark on the wall. Next measure upwards from the top of the piece of furniture 15 – 20cm – let’s call this W. Think of this as the bottom of the framed picture. Then measure upwards to the D-rings or tensioned wire in its hanging position. We will call this G. Then calculate W + G = R.
If Z (your eyelevel hanging point) is higher than R, then great, no problem; stick with Z. If R is higher then you are going to have to make a call. You need that extra height for the safety of the artwork. You don’t want to be bumping your artwork or creating a blurring of sightlines. But you also want it to sit in line with the other artworks that might be hanging in the room. You need to use your judgment here. R is the ideal height for this situation so you want to hang on it, or as close to it as possible.
In terms of width, it is more obvious. Measure the width of the wall and divide in half. Measure the width of the wall and divide in half. These two measurements need to meet. To do that from your half point, subtract the half length of the artwork. Perfect.
7. How to fudge it
Never just whack a picture up and leave it to your naked eye’s judgment. Always use a level to check that the artwork is hanging level. If your level is small enough, sit it on the top frame edge central to artwork. If you are using a wire, then it is just a simple shuffle and tweak. If you are really “out”, then the wire can be adjusted.
If you are hanging directly from D-latches to hooks / screws in the wall and you find that when you hang the work that it is not level – but it is so minor that you are unable to drill another hole – then there are a few cheat tactics to fudge it.
First you can give the problematic screw a light tap upwards – this may be all you need. If not, you could wrap a little masking tape around the hook / screw and that will lift the level slightly.

Image Source Elle Decoration blog
8. Hanging in stairwells and groupings
So moving from beginners to intermediate, group hangings need not be as daunting as they feel.All the same rules apply.
Most simply, if you are hanging a pair of works – one above the other – treat them as one large picture (whether they’re the same or different sizes). Find the center point between them, and use the same centre point 150cm rule.
If you are hanging a grouping of works in a horizontal line you need to decided whether they will all be hung on the same centre line, or whether top aligned ie. where the top edge of all the frames / artworks sit neatly in line.
Once you have determined that hanging point – draw a light pencil line across the wall or use a laser level. In terms of width, the standard spacing between artworks is 10-15cm, pending on the size of the pieces. Smaller pieces you might want to reduce that.
A good cheat’s check is to cut a little gauge from cardboard and turn up one end to act as a handle. You can easily put between the individual works to ensure they are even.
You need to find your centre point across the wall. You need to add up all the individual widths of the artworks and the spaces in between them to give your total hanging width.
Calculate your centre point – this will either be the middle work (if uneven numbers) or the middle gap in the series. From this centre point you want to work outwards to determine each placement. Basically it is half the artwork, plus the gap, plus half of the next artwork. It is very logical.

Mapping it out first always gives a more professional hang
A good rule of thumb is to lay it out on the ground first. Determine what the gap should be for the scale of the artwork (or piece of furniture underneath the hang). If you are feeling unsure or lacking confidence, then a simple trick is to make a paper template of each work and tape it up into position. You will be able to get an overall picture of the hang, and can tweak it if necessary, before you start banging into the wall.
Exactly the same process applies for a grid, Except that you are working off your eyelevel centre point, building your calculations up and down from there.
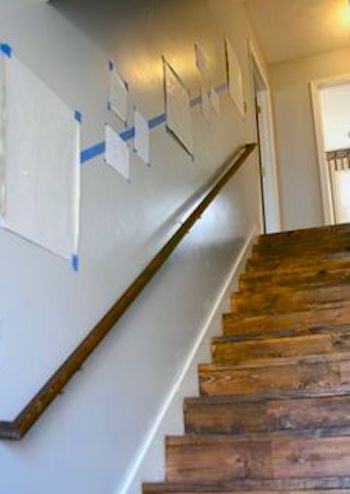
If you are hanging on a stairwell, then work out your arrangement on a flat surface first. Determine the total width of the piece. Then find the centre point of that width on the stair. At each end of the full length you want to calculate your standard eyelevel from the step. Then draw a light line between the two points.

The same rule applies on stairs – use a common centrepoint
The most simple stair hang is a single line with each work sitting at the same eyelevel from the step up. More complex salon hangs you might decide to create groupings, with each grouping using the same centre point. This creates steps of clustered works that walk their way up the wall.
The rule across all hanging is to get that central point calculated and then just evenly build out from here. It is no more difficult than hanging a single artwork – it is just more of the same. Take your time. Plot it out. Calculate it, test it and then take it slowly – and stand back often to test that you are on track.
Salon or clustered hangs of disparate images, objects and frame types have also become popular. There is no right or wrong answer to doing this. The one rule is to find you central point and then to work out from there, ensuring that the distance between the works are consistent. Always have a play on the floor first before you start.
9. Air flow and light
Rule number one of hanging any artwork is not to hang it in direct sunlight. This is especially true or works on paper and photographs. Oil and acrylics are a little more hardy, but it is still not advisable.
If you find that the wall you have hung a work of art on has little air circulation or is dark, than you can cut a cork from a bottle of wine at the same length as that hook / screws protrude from the wall and put them in the lower corners of the frame. This will hold the artwork out from the wall to allow better air circulation and prevent mould spots. It will not affect the look of the artwork from the front or the side.
10. Never never land
Blue Tac or double-sided tape are great for some jobs but they are a definite “no-go” when it comes to hanging art. We would add plastic hooks with adhesive tabs in the same category – which might sell well as an idea when feeling daunted by the task ahead – but will inevitably end in doom.
While the strength of the hook or the glue might be adequate, what is unknown is the quality of the paint surface that they are being adhered to. You are essentially placing all that weight – and confidence – in the veil like surface of the paint. There is no wall penetration, and hence the artwork is not securely anchored.
And our big tip – now that you are a pro at doing this – move you are artwork around. Think of it as a new year’s resolution. It is a fabulous way to continue to enjoy and engage with your artworks over the years – keeping them looking fresh and new.
It is really easy to add a little spackle, lightly sand and then a touch of paint on an old hole or a mistake.


